 Open Exchange
iOS平台上的FHIR和IRIS医疗版
Swift-FHIR-Iris
iOS应用程序支持将HealthKit数据导入InterSystems IRIS医疗版(或任何FHIR资源仓库库)
目录
演示目的
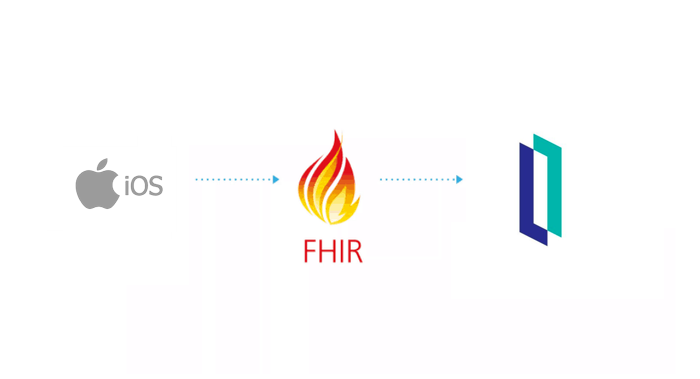
目的是创建FHIR协议的端到端演示。
这里的端到端指的是从一个信息源到另一个信息源,例如iPhone。
苹果HealthKit将收集到的健康数据转换为FHIR,再发送到InterSystems IRIS 医疗版存储库。
必须通过web接口访问这些信息。
TL;DR: iPhone -> InterSystems FHIR -> web界面.
如何运行此演示
先决条件
- 客户端 (iOS)
- Xcode 12
- 服务器和Web应用程序
- Docker
安装 Xcode
这里没有太多要说的,打开AppStore,搜索Xcode,安装。
打开SwiftUi project
Swift是苹果在iOS、Mac、Apple TV和Apple Watch中使用的一种编程语言,是objective-C的替代品。
双击Swift-FHIR-Iris.xcodeproj
单击左上角的箭头打开模拟器。
配置模拟器
打开Health
点击“Steps”
添加数据
启动InterSystems FHIR服务器
在该git的根目录下,运行以下命令:
docker-compose up -d
构建过程结束时,你将连接到FHIR资源仓库:
http://localhost:32783/fhir/portal/patientlist.html
该门户网站由@diashenrique创建.
为处理Apple活动足迹,进行了一些修改。
在iOS应用程序上操作
iOS应用程序首先会请求你同意分享部分信息。
点击授权
然后点击“Save and test server”对FHIR服务器进行测试
默认设置指向docker配置。
操作成功后,就可以输入患者信息。
名字、姓氏、生日、性别。
将患者信息保存到Fhir。弹出窗口将显示唯一的Fhir ID。
可在门户网站查阅该患者信息:
访问: http://localhost:32783/fhir/portal/patientlist.html
在这里我们可以看到,增加了一个新的病人“Toto”,0个活动。
发送她的活动信息:
回到iOS应用程序,点击“Step count”。
这里显示的是一周的步数。在我们的案例中有2条记录。
现在可以单击发送,将这些数据发送到InterSystems IRIS FHIR。
从门户网站上查询新的活动记录:
现在我们可以看到Toto有两条新的观察和活动消息。
你还可以单击“chart”按钮以图表格式显示。
工作原理
iOS
该demo大部分是基于SwiftUI构建的。
https://developer.apple.com/xcode/swiftui/
iOS和co的最新框架。
如何检查健康数据的授权
它在SwiftFhirIrisManager 类中。
该类采用单例模式,可使用@EnvironmentObject对应用程序中进行的所有操作进行注释。
更多信息请访问 : https://www.hackingwithswift.com/quick-start/swiftui/how-to-use-environm...
调用requestAuthorization的方法如下:
    // Request authorization to access HealthKit.
    func requestAuthorization() {
        // Requesting authorization.
        /// - Tag: RequestAuthorization

        let writeDataTypes: Set<HKSampleType> = dataTypesToWrite()
        let readDataTypes: Set<HKObjectType> = dataTypesToRead()

        // requset authorization
        healthStore.requestAuthorization(toShare: writeDataTypes, read: readDataTypes) { (success, error) in
            if !success {
                // Handle the error here.
            } else {

                DispatchQueue.main.async {
                    self.authorizedHK = true
                }

            }
        }
    }
其中healthStore是HKHealthStore()的对象。
HKHealthStore类似于iOS中的healthdata数据库。
dataTypesToWrite和dataTypesToRead是我们想要在数据库中查询的对象。
授权的目的可以通过在Info.plist xml文件中添加以下内容完成:
    <key>NSHealthClinicalHealthRecordsShareUsageDescription</key>
    <string>Read data for IrisExporter</string>
    <key>NSHealthShareUsageDescription</key>
    <string>Send data to IRIS</string>
    <key>NSHealthUpdateUsageDescription</key>
    <string>Write date for IrisExporter</string>
如何连接FHIR资源仓库
对于这一部分,我使用了从Smart-On-FHIR网站下载的FHIR包 : https://github.com/smart-on-fhir/Swift-FHIR
使用的类是FHIROpenServer。.
    private func test() {

        progress = true

        let url = URL(string: self.url)

        swiftIrisManager.fhirServer = FHIROpenServer(baseURL : url! , auth: nil)

        swiftIrisManager.fhirServer.getCapabilityStatement() { FHIRError in

            progress = false
            showingPopup = true

            if FHIRError == nil {
                showingSuccess = true
                textSuccess = "Connected to the fhir repository"
            } else {
                textError = FHIRError?.description ?? "Unknow error"
                showingSuccess = false
            }

            return
        }

    }
这一步将在单例swiftIrisManager中创建一个新的对象fhirServer。
接下来使用getCapabilityStatement()
如果能够检索到FHIR服务器的capabilityStatement,则意味着已成功连接到FHIR资源仓库。
这个资源仓库不在HTTPS下,默认情况下Apple会阻止这种通信。
想要获取HTTP支持,可以对Info.plist xml文件进行如下编辑:
    <key>NSAppTransportSecurity</key>
    <dict>
        <key>NSExceptionDomains</key>
        <dict>
            <key>localhost</key>
            <dict>
                <key>NSIncludesSubdomains</key>
                <true/>
                <key>NSExceptionAllowsInsecureHTTPLoads</key>
                <true/>
            </dict>
        </dict>
    </dict>
如何将患者信息保存到FHIR资源仓库
基本操作:首先检查存储库中是否已经存在该患者的信息
Patient.search(["family": "\(self.lastName)"]).perform(fhirServer)
搜索具有相同姓氏的患者。
在这里,我们可以想象一下其他场景,比如使用Oauth2和JWT令牌加入patientId及其令牌。但在这个演示中,我们简单操作即可。
如果该患者信息已经存在,可以对其进行检索;否则,则创建新的患者信息 :
    func createPatient(callback: @escaping (Patient?, Error?) -> Void) {
        // Create the new patient resource
        let patient = Patient.createPatient(given: firstName, family: lastName, dateOfBirth: birthDay, gender: gender)

        patient?.create(fhirServer, callback: { (error) in
            callback(patient, error)
        })
    }
如何从HealthKit中提取数据
通过查询healthkit商店 store(HKHealthStore())即可完成。
这里我们查询一下步数。
使用predicate做好查询准备。
        //Last week
        let startDate = swiftFhirIrisManager.startDate
        //Now
        let endDate = swiftFhirIrisManager.endDate

        print("Collecting workouts between \(startDate) and \(endDate)")

        let predicate = HKQuery.predicateForSamples(withStart: startDate, end: endDate, options: HKQueryOptions.strictEndDate)
然后,会根据数据类型(HKQuantityType.quantityType(forIdentifier: .stepCount))和predicate内容进行查询。
func queryStepCount(){

        //Last week
        let startDate = swiftFhirIrisManager.startDate
        //Now
        let endDate = swiftFhirIrisManager.endDate

        print("Collecting workouts between \(startDate) and \(endDate)")

        let predicate = HKQuery.predicateForSamples(withStart: startDate, end: endDate, options: HKQueryOptions.strictEndDate)

        let query = HKSampleQuery(sampleType: HKQuantityType.quantityType(forIdentifier: .stepCount)!, predicate: predicate, limit: HKObjectQueryNoLimit, sortDescriptors: nil) { (query, results, error) in

            guard let results = results as? [HKQuantitySample] else {
                   return
            }

            process(results, type: .stepCount)

        }

        healthStore.execute(query)

    }
如何将HealthKit数据转换为FHIR
在这部分,我们使用了微软软件包HealthKitToFHIR
https://github.com/microsoft/healthkit-to-fhir
这个包很有用,为开发商提供了将HKQuantitySample转换为FHIR Observation的功能。
     let observation = try! ObservationFactory().observation(from: item)
      let patientReference = try! Reference(json: ["reference" : "Patient/\(patientId)"])
      observation.category = try! [CodeableConcept(json: [
          "coding": [
            [
              "system": "http://terminology.hl7.org/CodeSystem/observation-category",
              "code": "activity",
              "display": "Activity"
            ]
          ]
      ])]
      observation.subject = patientReference
      observation.status = .final
      print(observation)
      observation.create(self.fhirServer,callback: { (error) in
          if error != nil {
              completion(error)
          }
      })
其中item是HKQuantitySample,在我们的例子中是stepCount类型。
这个factory完成了大部分工作,将“unit”和“type”转换为FHIR codeableConcept,并将“value”转换为FHIR valueQuantity。
对PatientId的引用是通过强制转换json fhir引用手动完成的。
let patientReference = try! Reference(json: ["reference" : "Patient/\(patientId)"])
对类别进行同样的操作 :
      observation.category = try! [CodeableConcept(json: [
          "coding": [
            [
              "system": "http://terminology.hl7.org/CodeSystem/observation-category",
              "code": "activity",
              "display": "Activity"
            ]
          ]
      ])]
最后,在fhir资源仓库中创建observation :
      observation.create(self.fhirServer,callback: { (error) in
          if error != nil {
              completion(error)
          }
      })
后端 (FHIR)
没什么好说的,它基于InterSystems社区的fhir模板 :
https://openexchange.intersystems.com/package/iris-fhir-template
前端
基于Henrique作品,Henrique是使用jquery制作的FHIR资源仓库的一个很好的前端。
https://openexchange.intersystems.com/package/iris-fhir-portal